Depth of field or DOF is a photography term that refers to the distance and focus of an object as it relates to the camera. Good use of DOF will isolate an object drawing attention or focus which naturally occurs to the human eye. For instance, if you hold up an object close to your face, your eyes will focus on it while things in the background will become “blurry”. This tutorial will show you how to apply this technique to a photo that does not have good DOF to begin with making it more “artistic”.
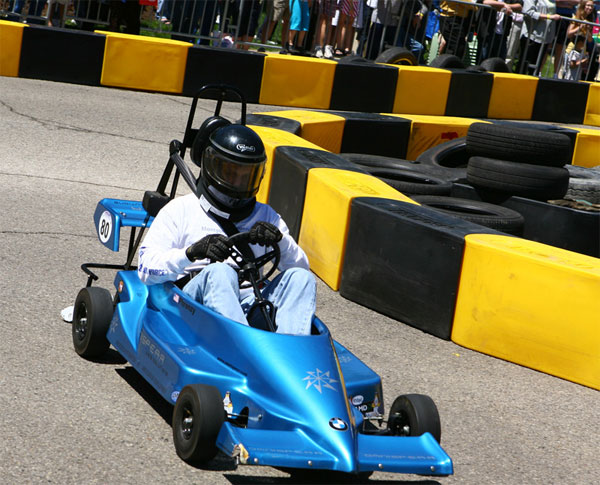
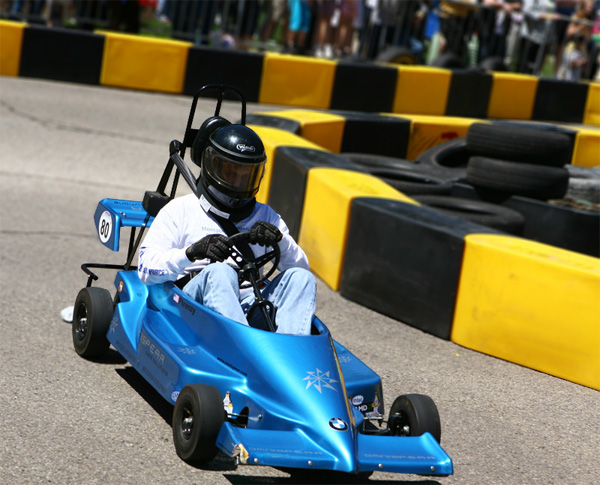
We will start with an image that has even focus throughout the frame. Our end result will have the OmniSpear Go-Kart in perfect focus while the track, barriers, and fans gradually lose focus and become blurry. This will replicate good DOF technique.
Our first step is to isolate our focus object. This is achieved by cutting out a shape of the object using the pen tool. Our kart is a complex object so precision is required. If you had a picture of a peach or a soccer ball you could just use your lasso or marquee tool. Once the shape is cut out we fill it with solid white.
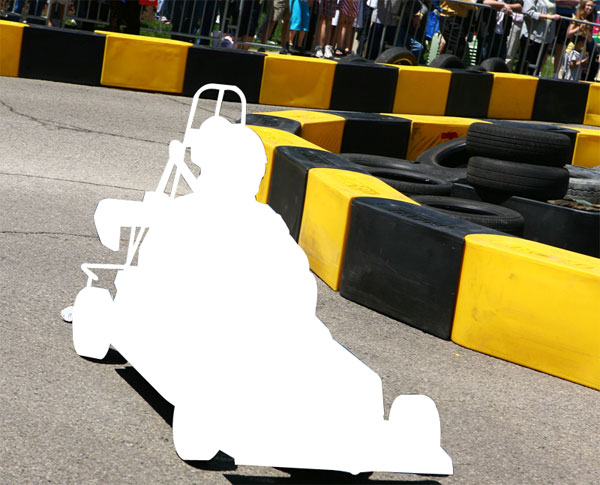
As we determine our focus objects for the image we will fill each of them from light to dark. Lightest will be in-focus while the darkest will become blurred or out of focus. This photo will have five distinct focus objects: go-kart, barrier with tires, barrier with a fence, fans, and the track.
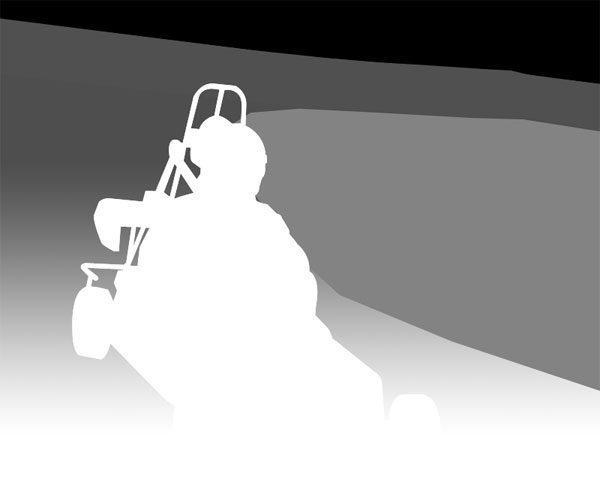
Each object is created, shaded and then layered to create a blur-map which we will use to pin-point our focus. This is done by selecting all of the visible layers and copying them to a new channel which we create. This new channel is called “Alpha 1” by default in Photoshop.
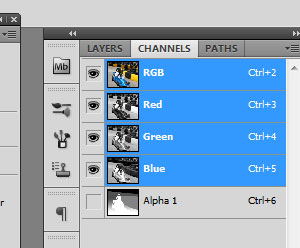
We now return to layers and de-select our blur-map items. At this point you should only see the original photo. Next is how we make the magic happen!
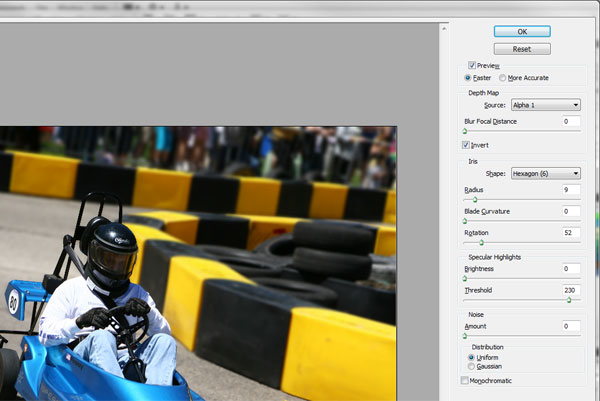
Select your photo layer. Go to the top menu and select Filter -> Blur -> Lens Blur… The controls and preview should show your photo as completely blurred at this point. Look at the Depth Map source and select: “Alpha 1”. This will apply your DOF to the photo. If your blur is opposite of what you expected just click the “invert” checkbox. You may need to tweak the radius to keep the image from becoming too blurry, in this example it is set to 9. Feel free to tweak the other iris settings which may create a more desired effect for what you are attempting to achieve.
Once the blur meets your satisfaction, just click the OK to see the processed results. You should end up with a modified image that has a simulated depth of field applied to it!
