Photoshop Tutorial – Using The Curves Tool

Photoshop Tutorial – Using curves to adjust image tone

The curves tool is very powerful for image manipulation. We use curves to precisely adjust the tonal characteristics of an image. In this tutorial we will explore the curves tool in its simplest form to adjust the contrast of an image.
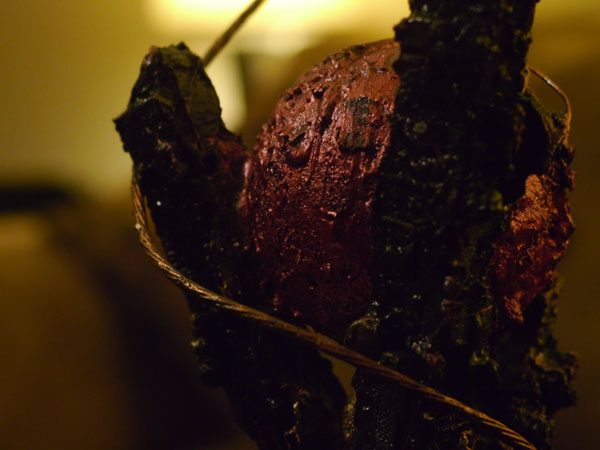
curves-photo-original

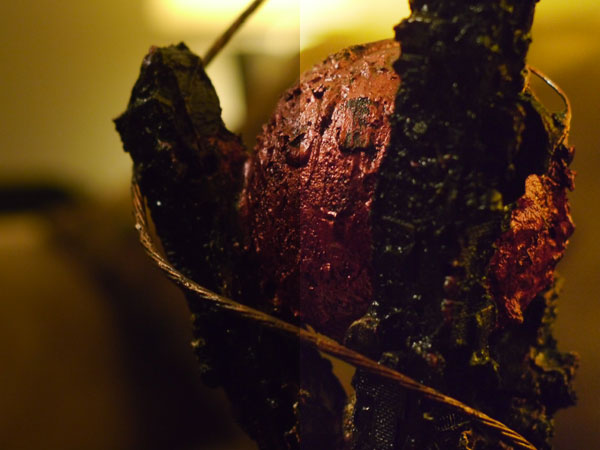
The original photograph was taken in a room with natural lighting and it looks acceptable. However, we can add an adjustment layer to it to give the photograph a precise contrast making it warm and rich in color.
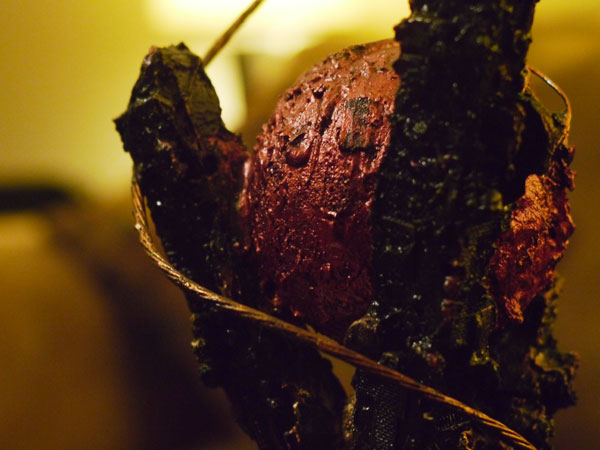
curves-photo-adjusted

The curves tool is very precise and a small adjustment goes a long way! Here is a side-by-side view of the photograph before and after the adjustment.
curves-photo-side-by-side

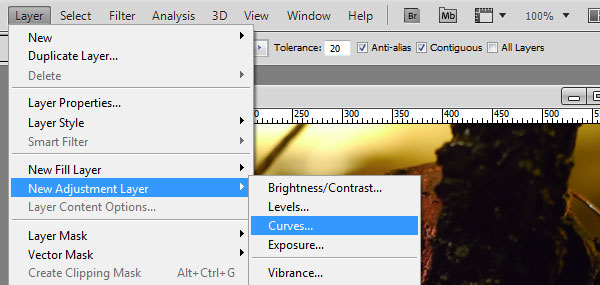
So how did we get to the finished product? It’s really quite simple. We start by adding an adjustment layer to our original photograph. From the top menu: Layer -> New Adjustment Layer -> Curves… There is also a shortcut in the layers window for this as well. We could also change the image directly without the adjustment layer however this allows us to see our effects without corrupting the original photograph.
curves-adding-adjustment-layer

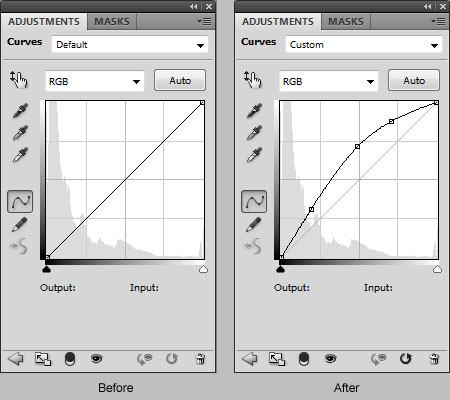
Once the new adjustment layer is inserted we manipulate the tone of the image by adding points to the “curve”. The curves window displays a histogram representing the distribution of light throughout the image. The left side is the dark the right side represents the lightness. Take note of the black to white gradient at the bottom of the chart.
curves-settings

Points may be added by simply grabbing the line at any point and moving it around. Once you have created a single adjustment point you may add others to gain the exact levels you require. Points may also be deleted as necessary just select the point and press your delete key.

This is a small sample of what can be achieved with the curves tool. Add additional adjustment layers and play with it, you may find combinations of different effects that make your image a work of art.

Photoshop Tutorial – Custom Shapes

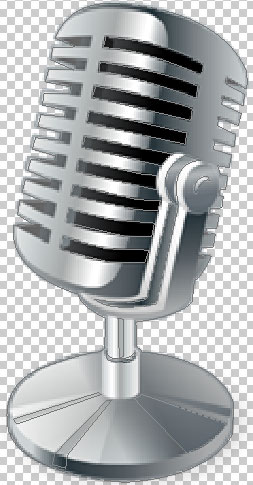
Custom shapes are vector-based objects which add an endless array of possibilities to your designs. Photoshop by default has a basic set of shapes which includes arrows, star-bursts, speech bubbles and other random objects. These items are handy but on occasion we need something completely unique.

In this tutorial we will explore the creation of our own custom shapes. For this example we are going to take a rather small raster icon and convert it to a vector shape. We start by opening up our image and selecting the pen tool. The pen tool has a few options once selected. Make sure the “paths” option is selected otherwise the shape you create will automatically “fill” with the selected foreground color making the process more difficult.

Pen Tool

Create the initial object outline using the pen. You should make this outline as detailed as possible since the shape you are creating will be a vector object which may be scaled to a very large size showing any inconsistencies. Our first path outline illustrates how a basic shape may be created. Although for this particular item it needs more detail.

outline-basic

Here is an example of the shape that would be created if we had just stopped here:
shape-basic

Take note of how it resembles the original but really lacks the detail which defines the object as a microphone.

outline-advancedWe now revisit the object and outline additional parts of the microphone which will add the detail needed to make our shape resemble the original more closely. You may add as much detail as needed to accomplish your specific needs. For this microphone, we decided to outline all of the “ribs” and parts of the stand including some of the reflections.

The resulting custom shape is considerably more complex which makes a better representation of the original item.

shape-advanced

You may be asking “how did it go from a path to a shape?” That part is actually quite simple. Once you have created your paths make sure the layer containing them is selected. Go to the top menu: Edit -> Define Custom shape…

shape-select

Name your new shape and it will be added to your shape library for use in any project you may need it. Select the custom shape tool from the hidden menu under the rectangle and have some fun with it!

Here is an example of our new microphone shape re-sized and colorized.

microphone-shapes

Photoshop Tutorial – Using Clipping Masks

One of the most common techniques used in Photoshop is masking. It is used to show or hide different parts of an image, usually based on either a color or shape. Clipping masks are handy when a specific shape area needs to be revealed. We use them often when creating buttons or teaser elements that have rounded corners or special shapes that require an image as a background.

In this tutorial we will demonstrate how to create a set of teaser buttons using the clipping mask technique. We often encounter a page element that has a repetitive design or shape but requires different backgrounds to represent its unique purpose. The main benefit of this technique is that once the mask is created it may be applied to as many layers as needed to accomplish your design goal.

Our example represents a simple teaser element that has three unique categories: dining, entertainment, and fitness. Our site or application would take the user to each specific area once the element is selected. We will now demonstrate how to quickly create this example and show how it scales to as many images as needed.

Teaser Images Clipping Mask

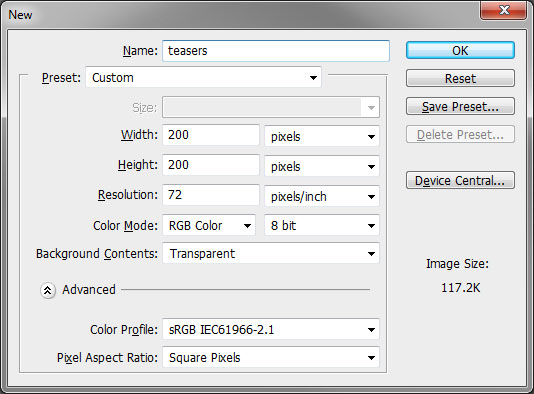
Our first step is to create a new project with our required settings. Since we generally design for the web our image will be sized to 200 x 200 pixels at 72dpi with a transparent background.

New Photoshop Document

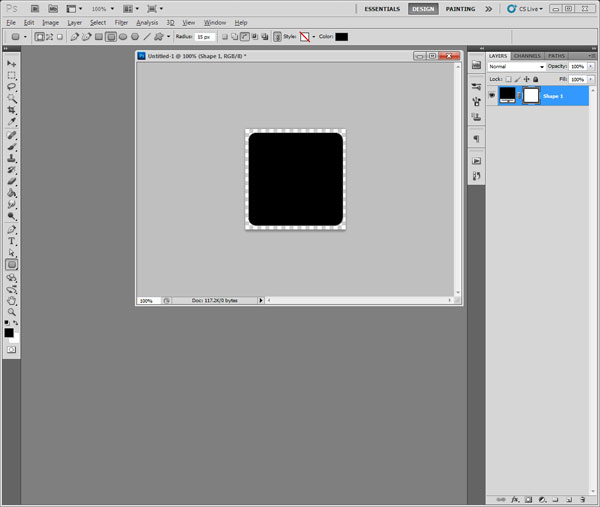
Once the image is created, we will create our button shape on the first layer using the “Rounded Rectangle” tool. It is located under the standard “Rectangle” tool, accessible by clicking and holding the small black corner and selecting it from the additional tools list. The radius has been set to 15px which makes for a nice and clean rounded edge. Now that our button shape has been created we will proceed to adding an image to it.

Photoshop shape layer

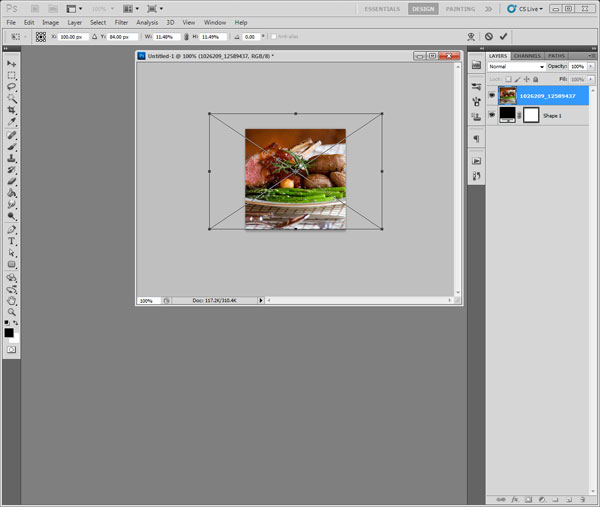
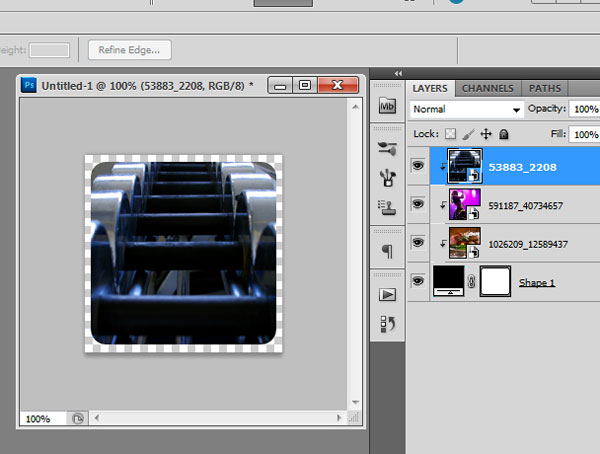
Although there are many ways of adding an image layer, we are going to go step-by-step. We will manually create a new layer by using the menu: Layer->New->Layer… This will add the new layer above our button shape. Then we will select the new layer and go to: File->Place… This will open up a browser window where we must hunt for our desired image to be “placed” on the new layer. Once it is placed, we will size it appropriately using the handles then we hit the “Enter” key to apply the transformation.

Image placement Photoshop

Now that our image is placed approximately where we want it, the next step is to apply the clipping mask. Our image layer should still be selected so we go to: Layer -> Create Clipping Mask. The result should be an image with perfectly rounded corners. One of the benefits to using clipping masks is that we may now move or re-size the background image as needed and the shape will stay the same! We may now repeat this technique for as many unique images as required. Keep placing new images above your shape layer and they will end up with a similar result.

Multiple layers in Photoshop

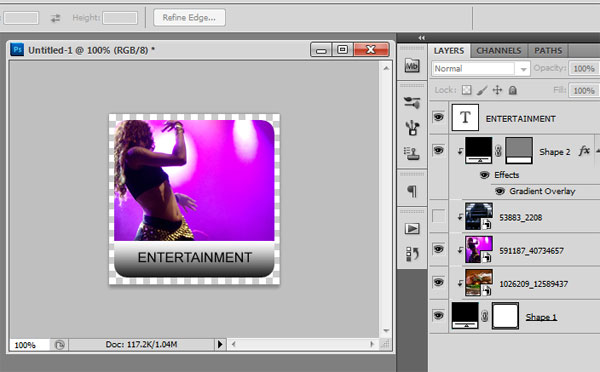
We will continue to use this technique to add the titles to each of our unique teaser elements. This is a simple design so we will add a 50px tall rectangle on the lower part of the box. We place this element above our images and our initial shape. Once positioned, we will create a clipping mask once again creating the rounded corners. Afterwards we add a text layer and our desired title to each element, save them out in the format we need and call it a day!

Completed teaser button

Subliminal Marketing

James Vicary in the late 1950’s performed an experiment in front of moviegoers (unbeknownst to them) flashing two messages: “Drink Coca-Cola” and “Eat Popcorn”. His finding shows there was a substantial increase in the sales of soda and popcorn. When Vicary was asked to reproduce his findings, he admitted he had falsified the data.

Nearly 50 years later, Vicary’s hoax is still in use (and still fine-tuned) by many companies practicing subliminal advertising and marketing. Can a logo of a company build trust and loyalty with consumers (as subtle as shifting a character within a company name)? Definitely something to consider when you are debating between buying an Apple product versus Dell, Lenovo, or the many PC makers out in the market.

Do you see the arrow in FedEx’s logo? The arrow is pointing to the right (parked between the two letters E and X), possibly hinting at “wanting to move something forward”.

Further reading for your consideration:

15 Corporate Logos That Contain Subliminal Messaging

Small Business Marketing Advice: Should You Use Subliminal Advertising?

Subliminal Messages Motivate People To Actually Do Things They Already Wanted To Do

Subliminal advertising really does work, claim scientists

UCL study: subliminal messaging ‘more effective when negative’

Manually add depth of field to an image – Photoshop Tutorial

Depth of field or DOF is a photography term that refers to the distance and focus of an object as it relates to the camera. Good use of DOF will isolate an object drawing attention or focus which naturally occurs to the human eye. For instance, if you hold up an object close to your face, your eyes will focus on it while things in the background will become “blurry”. This tutorial will show you how to apply this technique to a photo that does not have good DOF to begin with making it more “artistic”.

We will start with an image that has even focus throughout the frame. Our end result will have the OmniSpear Go-Kart in perfect focus while the track, barriers, and fans gradually lose focus and become blurry. This will replicate good DOF technique.
Image with even focus throughout the frame

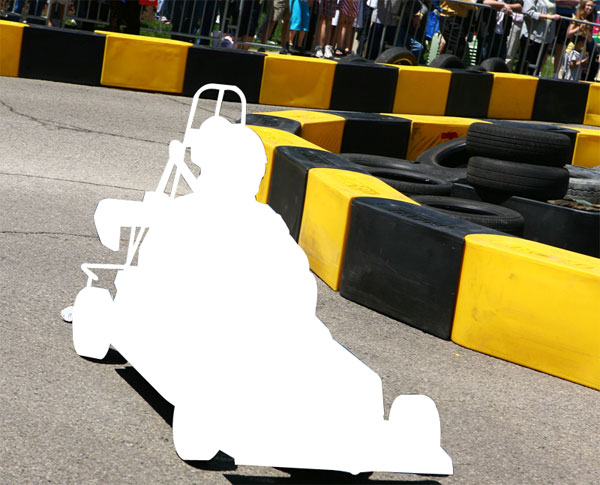
Our first step is to isolate our focus object. This is achieved by cutting out a shape of the object using the pen tool. Our kart is a complex object so precision is required. If you had a picture of a peach or a soccer ball you could just use your lasso or marquee tool. Once the shape is cut out we fill it with solid white.
Isolated object masked

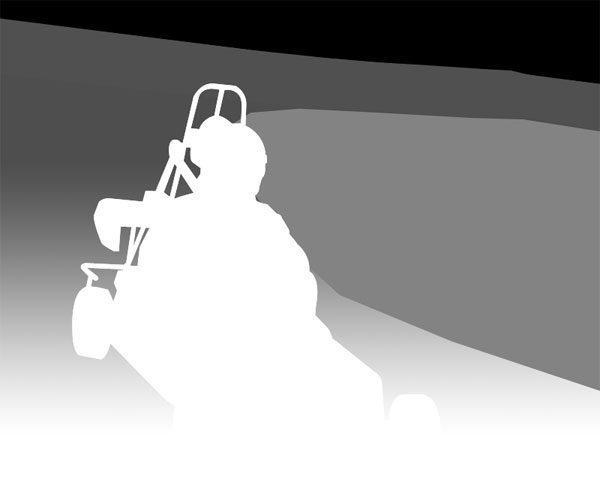
As we determine our focus objects for the image we will fill each of them from light to dark. Lightest will be in-focus while the darkest will become blurred or out of focus. This photo will have five distinct focus objects:  go-kart, barrier with tires, barrier with a fence, fans, and the track.
Focus map objects

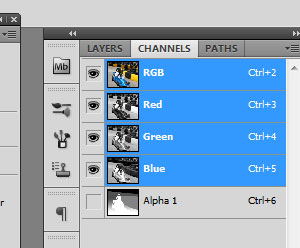
Each object is created, shaded and then layered to create a blur-map which we will use to pin-point our focus. This is done by selecting all of the visible layers and copying them to a new channel which we create. This new channel is called “Alpha 1” by default in Photoshop.
Channels window

We now return to layers and de-select our blur-map items. At this point you should only see the original photo. Next is how we make the magic happen!
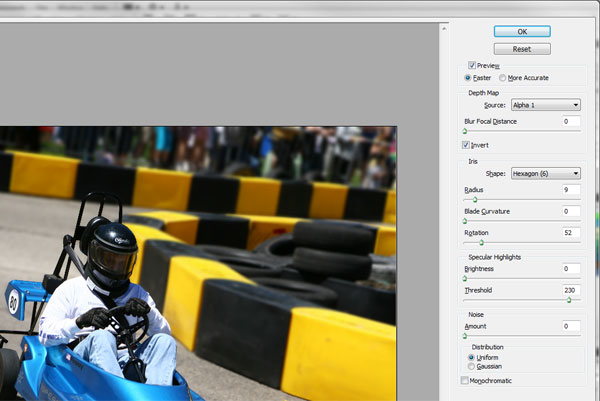
Lens Blur settings photoshop

Select your photo layer. Go to the top menu and select Filter -> Blur -> Lens Blur… The controls and preview should show your photo as completely blurred at this point. Look at the Depth Map source and select: “Alpha 1”. This will apply your DOF to the photo. If your blur is opposite of what you expected just click the “invert” checkbox. You may need to tweak the radius to keep the image from becoming too blurry, in this example it is set to 9. Feel free to tweak the other iris settings which may create a more desired effect for what you are attempting to achieve.
Image with depth of field manually applied

Once the blur meets your satisfaction, just click the OK to see the processed results. You should end up with a modified image that has a simulated depth of field applied to it!