One of the most common techniques used in Photoshop is masking. It is used to show or hide different parts of an image, usually based on either a color or shape. Clipping masks are handy when a specific shape area needs to be revealed. We use them often when creating buttons or teaser elements that have rounded corners or special shapes that require an image as a background.
In this tutorial we will demonstrate how to create a set of teaser buttons using the clipping mask technique. We often encounter a page element that has a repetitive design or shape but requires different backgrounds to represent its unique purpose. The main benefit of this technique is that once the mask is created it may be applied to as many layers as needed to accomplish your design goal.
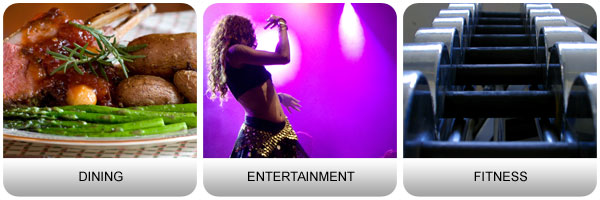
Our example represents a simple teaser element that has three unique categories: dining, entertainment, and fitness. Our site or application would take the user to each specific area once the element is selected. We will now demonstrate how to quickly create this example and show how it scales to as many images as needed.
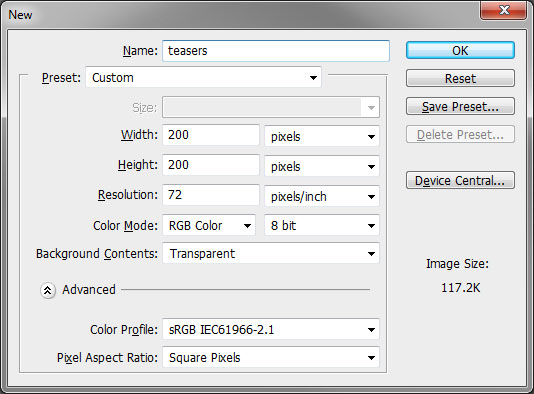
Our first step is to create a new project with our required settings. Since we generally design for the web our image will be sized to 200 x 200 pixels at 72dpi with a transparent background.
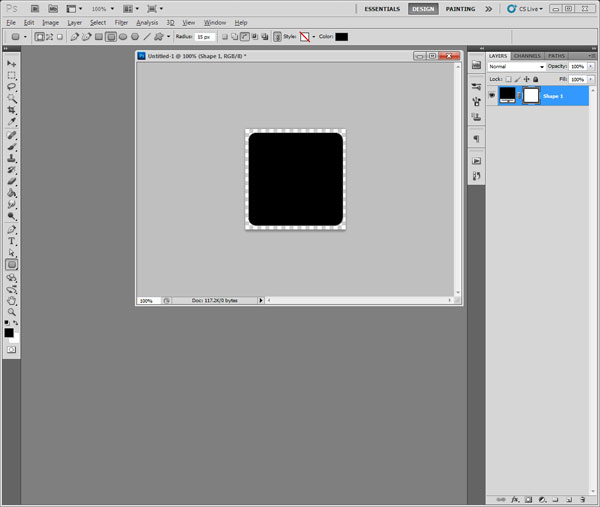
Once the image is created, we will create our button shape on the first layer using the “Rounded Rectangle” tool. It is located under the standard “Rectangle” tool, accessible by clicking and holding the small black corner and selecting it from the additional tools list. The radius has been set to 15px which makes for a nice and clean rounded edge. Now that our button shape has been created we will proceed to adding an image to it.
Although there are many ways of adding an image layer, we are going to go step-by-step. We will manually create a new layer by using the menu: Layer->New->Layer… This will add the new layer above our button shape. Then we will select the new layer and go to: File->Place… This will open up a browser window where we must hunt for our desired image to be “placed” on the new layer. Once it is placed, we will size it appropriately using the handles then we hit the “Enter” key to apply the transformation.
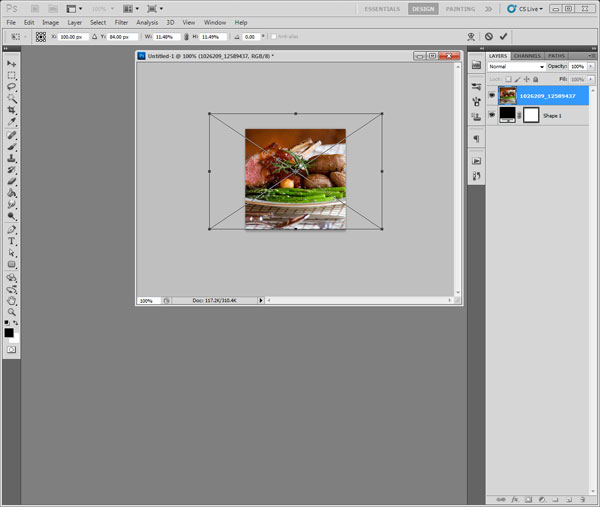
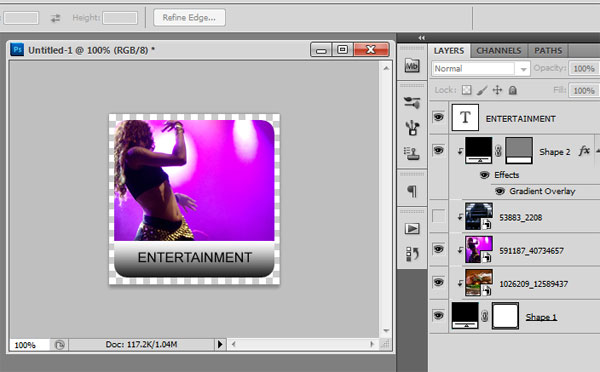
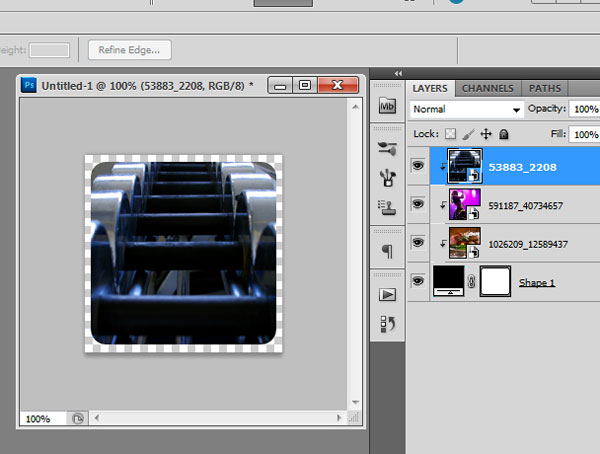
Now that our image is placed approximately where we want it, the next step is to apply the clipping mask. Our image layer should still be selected so we go to: Layer -> Create Clipping Mask. The result should be an image with perfectly rounded corners. One of the benefits to using clipping masks is that we may now move or re-size the background image as needed and the shape will stay the same! We may now repeat this technique for as many unique images as required. Keep placing new images above your shape layer and they will end up with a similar result.
We will continue to use this technique to add the titles to each of our unique teaser elements. This is a simple design so we will add a 50px tall rectangle on the lower part of the box. We place this element above our images and our initial shape. Once positioned, we will create a clipping mask once again creating the rounded corners. Afterwards we add a text layer and our desired title to each element, save them out in the format we need and call it a day!