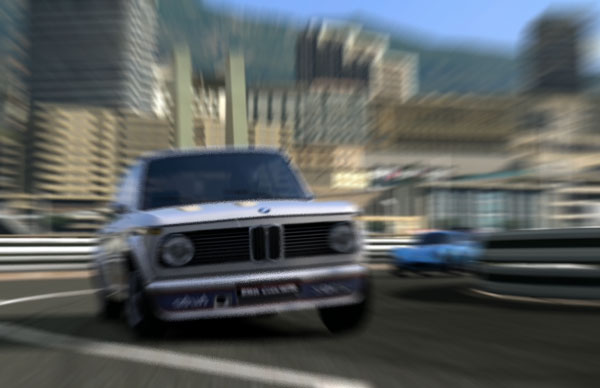
The radial blur filter allows us to enhance an image by adding a zoom effect. This is a powerful effect that will require us to mask out parts of the image to preserve our subject. In this example we are focusing on the vintage BMW 2002tii sports car. Take note of the flat focus of original image, although slightly dramatic we will use radial blur to add some excitement.
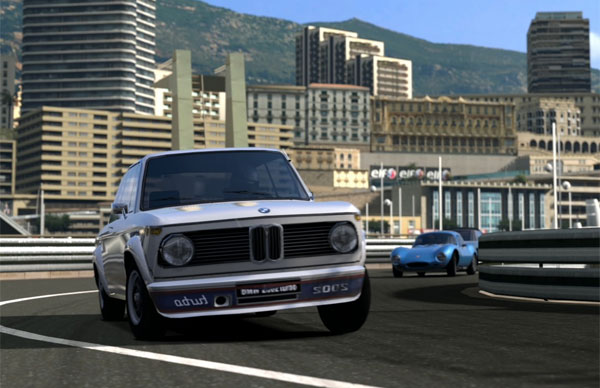
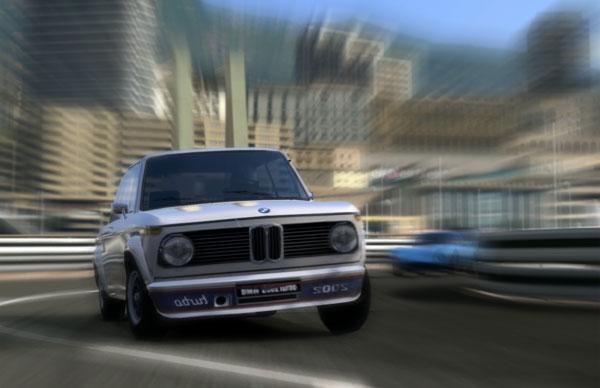
Image with radial blur effect added
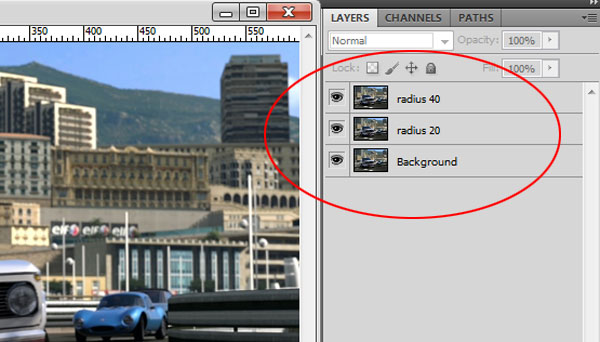
In order to create this result we start by duplicating our background image layer twice for a total of three layers. Select your background then go to: Layers -> Duplicate Layer… Let’s rename the top two layers radius 20 and radius 40.
Our next step is to add the filter effect to each of the duplicated layers. We start by selecting the radius 20 layer and adding: Filter -> Blur -> Radial Blur… This will bring up the options for the effect. We set the effect for this as follows: Amount = 20, Blur Method = Zoom, Quality = Best. We also drag the Blur Center to the approximate location of our subject, the BMW sports car.
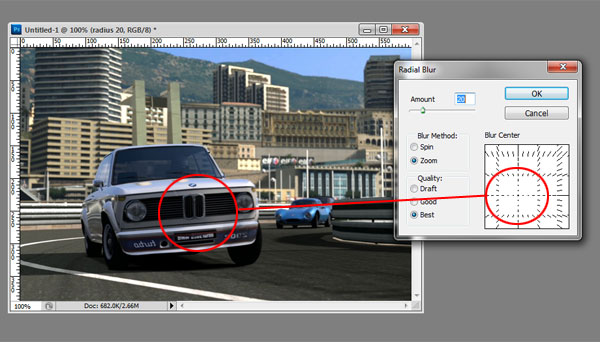
There is no built-in preview for this effect so you will need to make your best guess. It may take a few attempts to get your focus point set for the Blur Center.
Our next step will be to replicate this effect on the radius 40 layer. Add the filter effect and only change the amount from 20 to 40. Do not change anything else in the settings for the Radial Blur except for the amount. It should result in a layer with a greater blur effect.
The result is a more intensely blurred layer
Our next steps will involve the use of layer masking to reveal our sports car amongst the blur effects. Select each of the radius layers and add a layer mask to each one. There is a handy shortcut button for this located in the footer of the layers window that will add the mask to the selected layer.
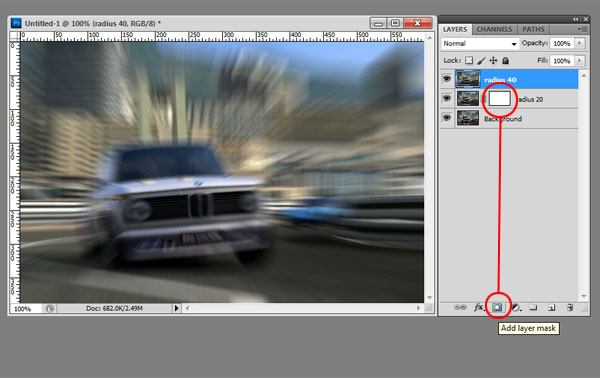
Adding layer masks
Repeat this process for both of the radius layers, we will reveal the focused object from each layer.
Start by hiding the radius 40 layer by clicking the small eye icon in the layers window. Then select the layer mask (white rectangular block) on the radius 20 layer. With the layer mask selected, choose your gradient tool and make sure the color palette is set to pure black and white. Also make sure your gradient is set to: Radial Gradient. Select the center of your object and drag the radius out to the edge of your intended focus area. This will result in a center focused image with blurry edges.
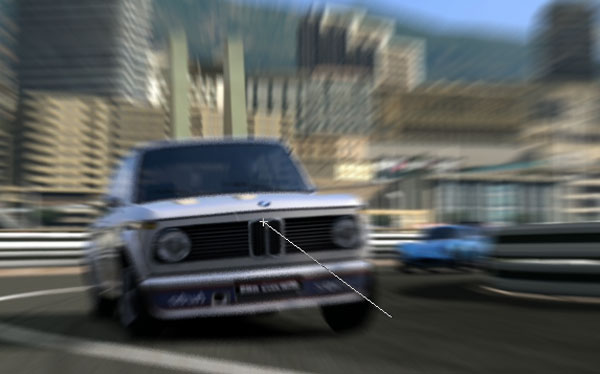
Setting the Radial Gradient
Our next step is to manually brush-in more of the focus object. We achieve this by selecting the paintbrush tool, giving it a manageable brush size and setting the opacity lower. For this image, we set it to 50%. If the opacity is set too high the resulting mask will have harsh edges and produce an unnatural result. Brush around your object until the points of focus start to show through.
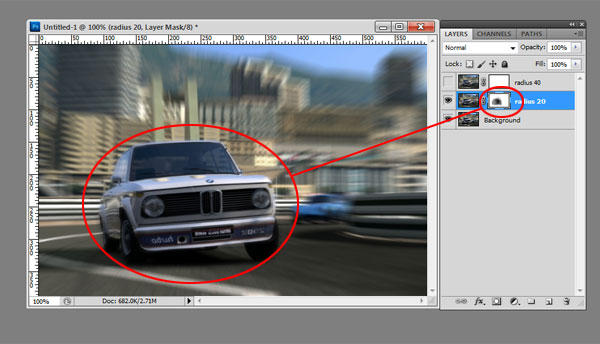
Masking the layer
Repeat this same masking process for the radius 40 layer. This will result in having your focus object completely visible and everything else blurred. The final step is to adjust the opacity of the radius 40 and radius 20 layers. The amount set is completely subjective. You will need to find the balance that works for you. We set the opacity to 75% for both layers in this example.
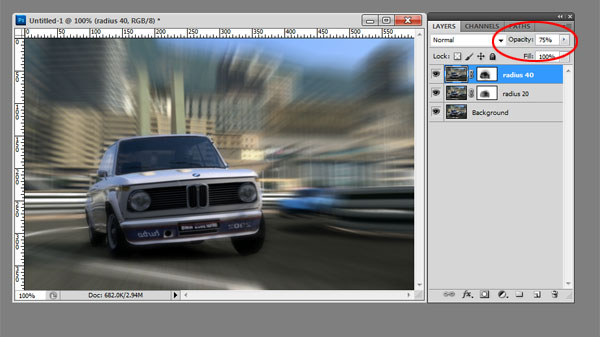
Setting the layer opacity
Once you are satisfied, save your image into your desired format. Don’t forget to have some fun with it!


